
-
Personal Alarms
-
Features
-
 24/7 Careline Service
There for you 24 hours a day, seven days a week.
-
Automatic Fall Detection
Alarms that alert us when you fall. Ideal for people who have fallen or are worried about falling.
-
Alarms for the Elderly
Reassurance for people in later life and their loved ones.
-
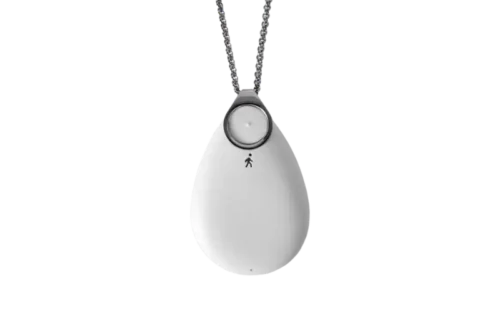
Pendant Alarms
Alarms worn around the neck that are comfortable and discreet.
-
Digital Personal Alarms
Keep your independence when your landline is disconnected.
-
Panic Button Alarms
Get peace of mind knowing that help is just a button press away.
-
-
Why Choose Us
-
 Who are Telecare24?
Learn why you should put your trust in the only service recommended by TV's Dr Hilary Jones.
-
Our Mission & Values
Read more about what drives us to help our customers and their loved ones live worry-free.
-
Meet the Team
Meet some of the people who help to make us a great telecare service.
-
-
Resources & Support
-
The Digital Switchover
Learn more about the UK's big digital switchover and what it means for telecare users.
-
Key Safes
Allow access to your home when you need help. Ideal for people without keyholders living nearby.
-
VAT Exemption
Learn more about VAT exemption and how you can save 20% when you order a Telecare24 alarm.
-
Video Library
Home to a collection of videos, including advisory videos, produced by Telecare24.
-
- Free Info Pack
- View Plans


Troubleshooting Your Digital Fall Alarm
Welcome to our comprehensive guide on troubleshooting and installing your fall alarm system

Navigate this page
Use the links below to jump to the section you want to read first:
Common Self-Install Issues and Solutions
Our Digital Fall Alarm is really easy to set-up and use.
Most common personal alarm faults can be quickly and easily resolved by following the advice to the alarm announcements below.
Questions & Resolutions
- Ensure that the power connection is properly inserted into a functional electrical socket and switched on at the wall.
- Attempt plugging the device into a different power outlet to verify whether the current outlet is faulty.
- In the event of a power cut, the base unit features a backup battery that will last up to 48 hours dependent on use, ensuring your careline service remains intact while your mains power is restored. Keep in mind that if the backup power has run out, the wearable alarm will not do anything when activated.
- If you have broadband in your home and your base unit is connected directly to your broadband router, your alarm will only work if the broadband router is still powered on.
- To ensure your protection in situations like this, upgrade to our new Digital Fall Alarm plan which uses SIM technology, keeping you connected when your broadband fails.
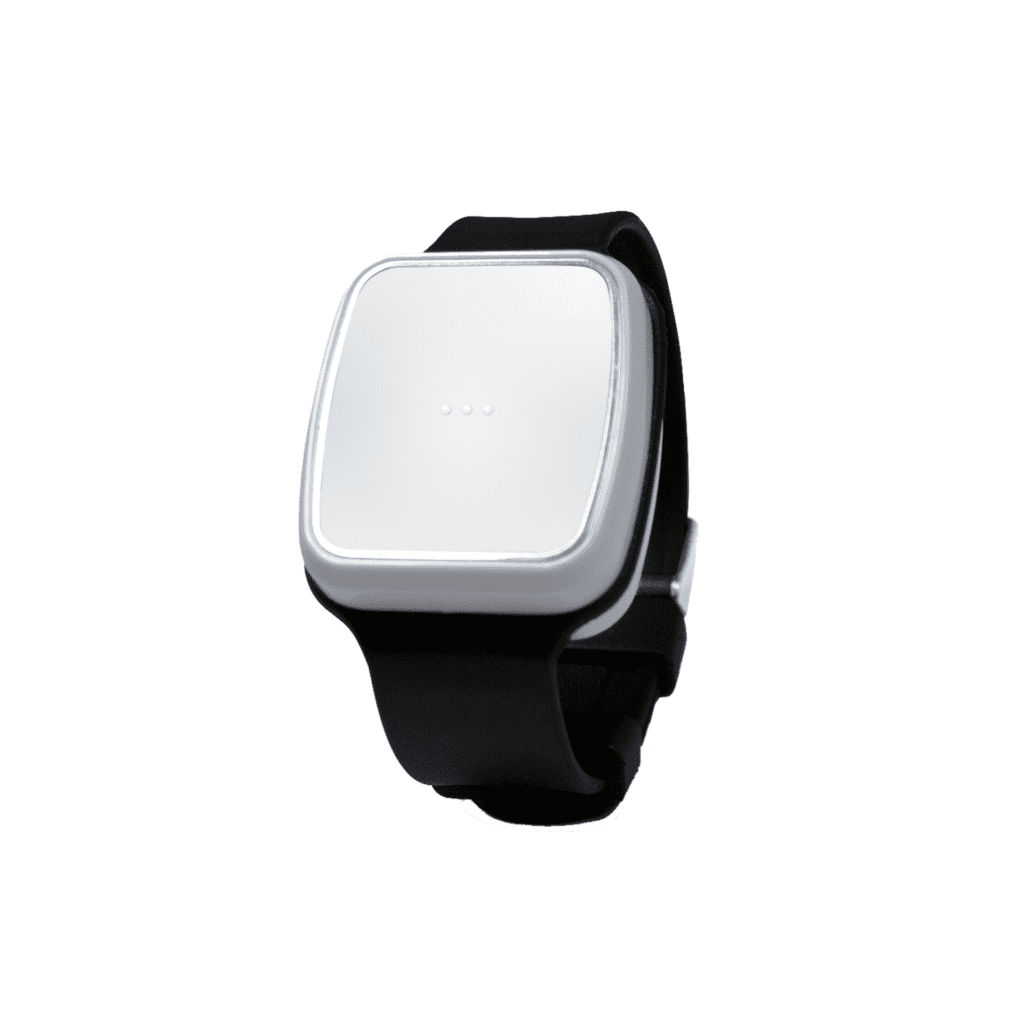
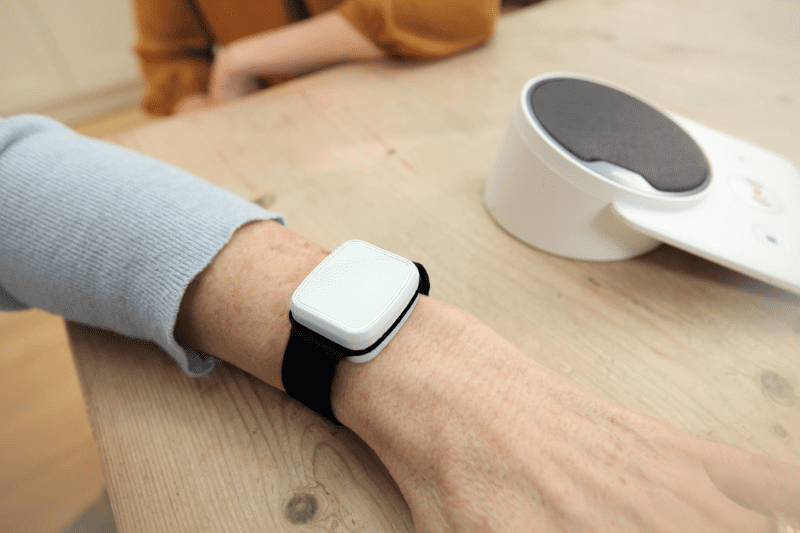
The fall sensor has a battery life of 18-24 months, dependent on use. Our team will automatically be notified when the battery on your fall sensor runs low. When this happens, we’ll reach out to arrange a free replacement.
The fall sensor is rated as IP67 water resistant so that you can comfortably wear your alarm whenever you take a bath or shower.
The IP67 rating means that the alarm can be dropped into a body of water up to a meter deep for as long as half an hour.
The fall sensor technology inside our fall sensor is designed not to trigger if thrown on the floor or dropped.
You should test your fall alarm every 4-6 weeks.
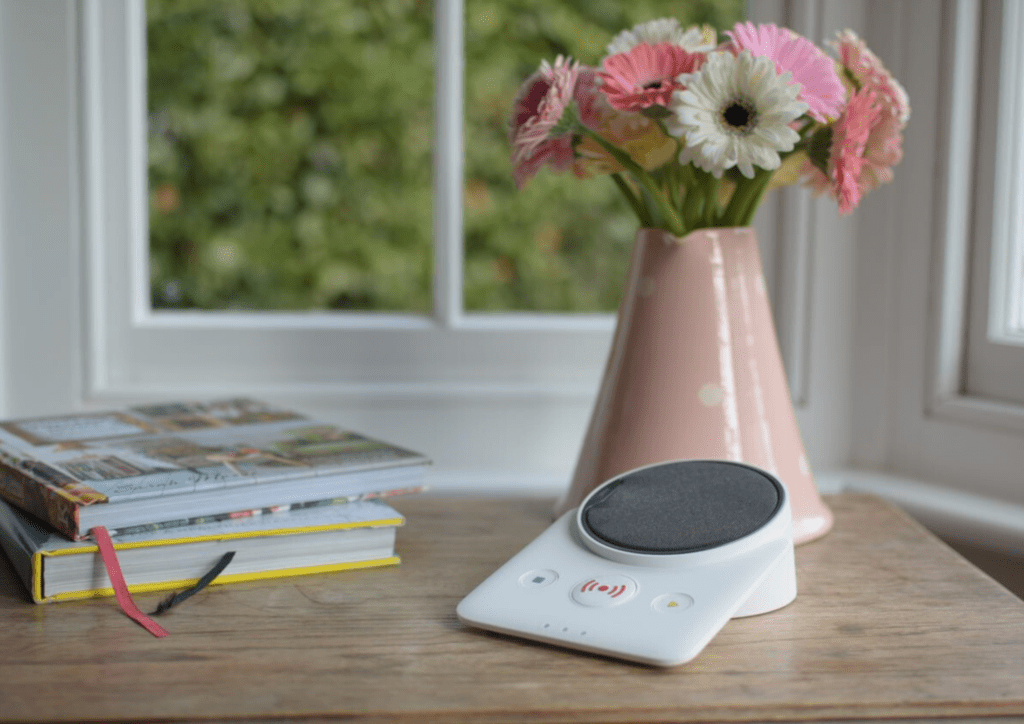
1. To test press the button on the front of your fall sensor.
2. The base unit will show a flashing red light while it connects through to our 24/7 monitoring centre.
3. Moments later, you’ll be connected to a member of our emergency response team. Simply tell our team that you are making a test call to check that your alarm is working correctly.
4. Our team will tell you everything is okay and they will end the call. Your alarm is now set up and ready to use, should you ever need it.
If you have trouble hearing us when we speak to you through your alarm base unit, the volume on the speaker can be turned up remotely by the care team.
If you still can’t hear us, we will call your mobile phone to ensure everything is okay.
If we still can’t talk to you, we’ll call one of your emergency contacts to check that you are okay.
As a last resort or if the situation requires, we’ll call the emergency services.
Installing you fall alarm
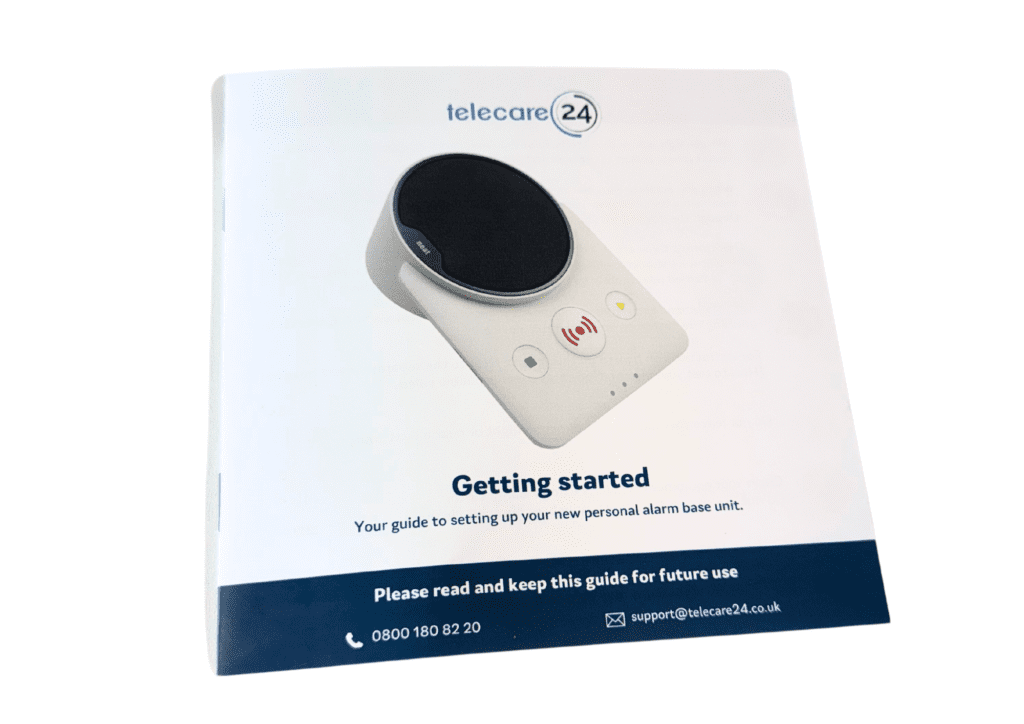
Upon receiving your order, you will find a comprehensive package designed to simplify the installation process and ensure optimal functionality of your fall alarm system.
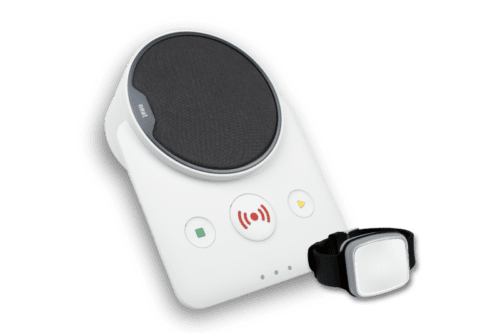
What's in the box?

The fall sensor
The base unit
How to install your fall alarm?
Installation for homes with broadband
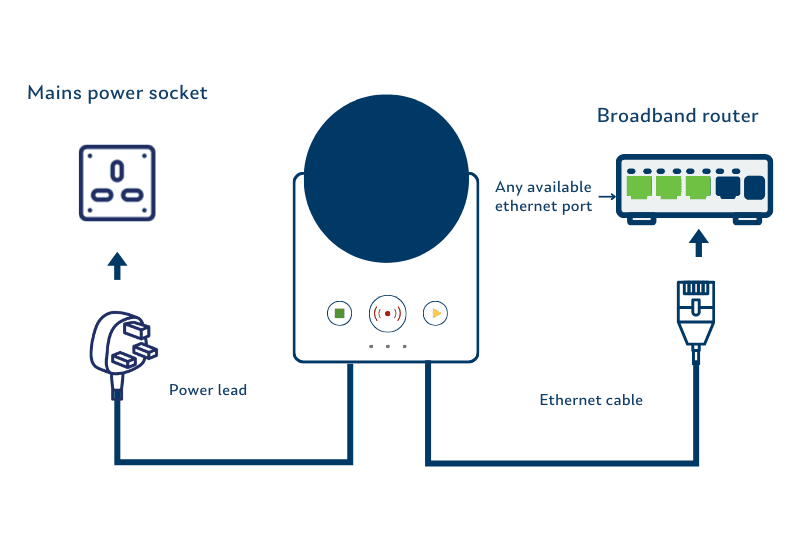
1. Start by placing your base unit near near your broadband router and an available mains power socket – an extension lead won’t be suitable. Ideally, this will be somewhere central in your home or in the room where you spend most of your time.
2. Take the power lead and plug it into the socket on the wall, then switch it on.
3. Now is the time to connect your base unit to an available port on your broadband router using the ethernet cable provided.
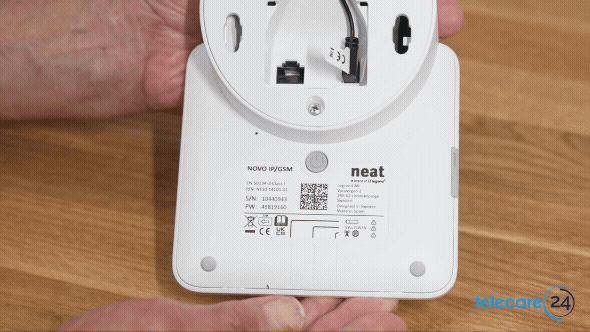
5. Finally, on the underside of the base unit, find the grey power button in the middle. Press and hold it for about 3 seconds and then let go.
You’ll see the lights on the front of the unit flash briefly, before going off. It may take several minutes for the green LED light to go off while your base unit connects to the remote monitoring centre.
When you speak to our care team, tell them it’s new and you’re testing it out. That’s it!
Alternative option
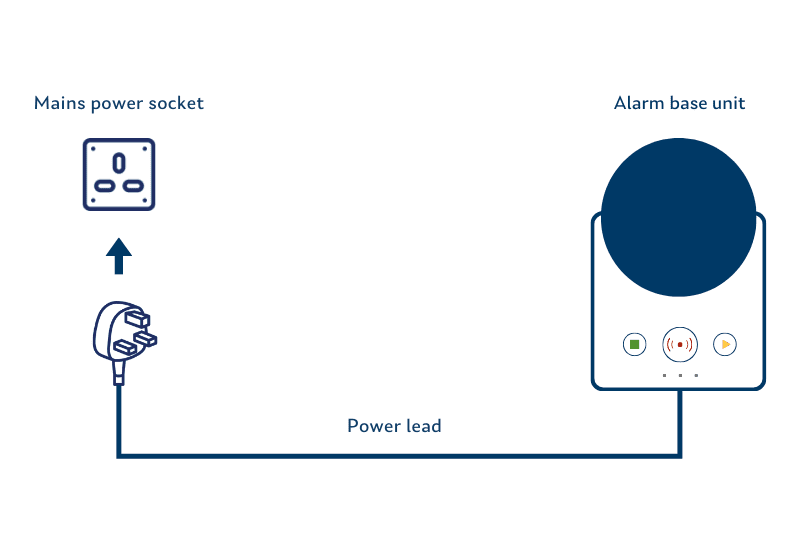
1. Start by placing your base unit near an available mains power socket – an extension lead won’t be suitable.
2. Take the power lead and plug it into the socket on the wall, then switch it on.
3. On the underside of the base unit, find the grey power button in the middle. Press and hold it for about 3 seconds and then let go.
You’ll see the lights on the front of the unit flash briefly, before going off. It may take several minutes for the green LED light to go off while your base unit connects to the remote monitoring centre.
Struggling to find a good signal? Call us free on 0800 180 82 20 for advice.
Installation guide